Have you ever stood in front of your open fridge, searching for something that’s both satisfying and good for you? That mid-afternoon slump or the pre-dinner hunger can feel like a real challenge. We’ve all been there, wanting a bite that feels like a treat but doesn’t leave us feeling sluggish.
What if the answer was already in your crisper drawer? This simple recipe transforms a humble vegetable into something truly magical. The process of oven roasting brings out a natural sweetness you might not expect, creating crisp, golden-brown edges that are simply irresistible.
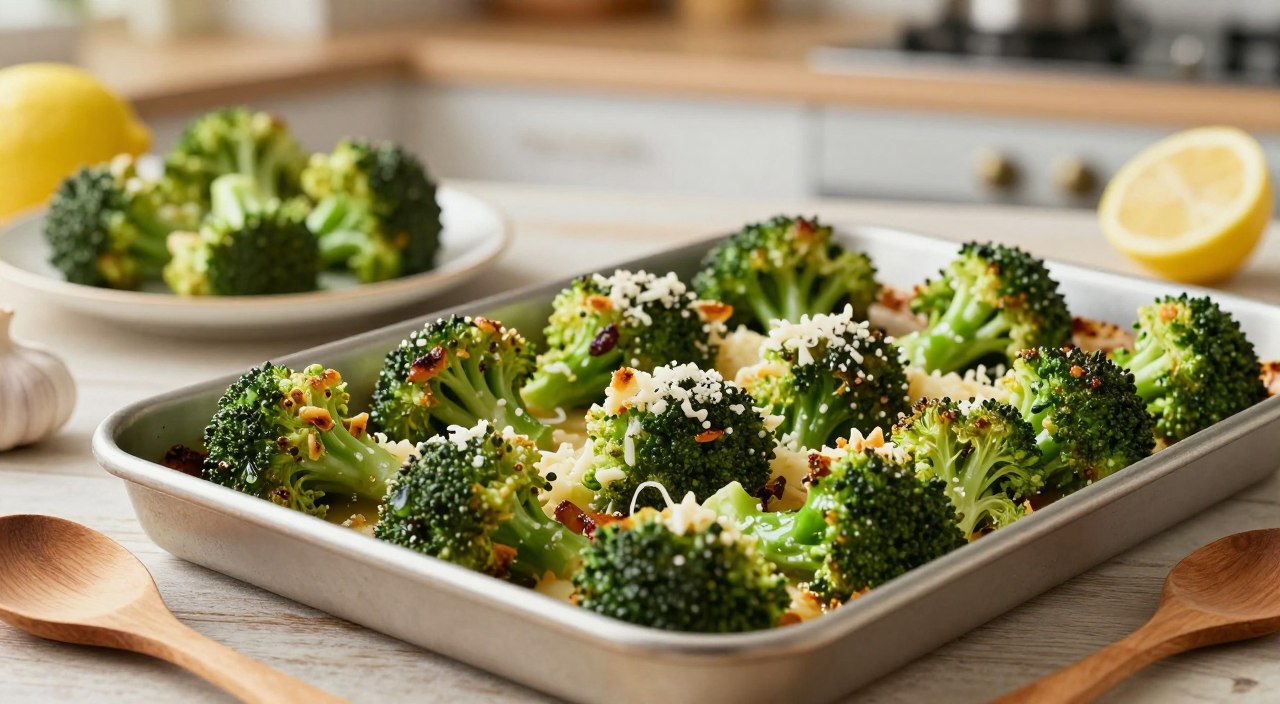
This dish is the ultimate two-in-one solution for your kitchen. It shines as a versatile side dish next to your favorite protein, but it’s also perfect for munching straight from the pan. The savory parmesan cheese and garlic make each floret absolutely crave-worthy.
In about 25 minutes, you can create a dish that your whole family will love. Get ready to fall in love with a new go-to recipe that solves the snack and side dish dilemma in one delicious swoop.
Introducing Your New Favorite Broccoli Snack
Imagine transforming a simple green vegetable into something you’ll crave between meals. This oven-baked creation bridges the gap between healthy eating and satisfying snacking. You get the best of both worlds in one delicious package.
The magic happens when florets hit the hot oven. Heat works wonders, creating a sweet, nutty taste that’s completely different from steamed versions. Your kitchen fills with an incredible aroma that draws everyone in.
This versatile dish serves double duty beautifully. It works as a fantastic side dish for dinners, yet stands strong as a snack on its own. You’ll find it hard to resist eating straight from the pan.
Each bite offers perfect texture contrast. Golden edges provide satisfying crunch while centers stay wonderfully tender. The combination creates a genuinely crave-worthy experience that makes eating vegetables exciting.
Essential Ingredients and Kitchen Tools
The right tools can make all the difference in achieving perfect results. Having the proper equipment ensures your cooking experience is smooth and enjoyable.
Choosing the Best Broccoli Florets
Selecting quality ingredients starts with fresh, vibrant florets. Look for bright green color and firm stems. Avoid any yellowing or wilting.
Your vegetable should feel crisp and sturdy. This ensures it will hold up well during cooking. Freshness matters for both flavor and texture.
Must-Have Tools: Baking Sheet and Parchment Paper
Your essential equipment for this recipe is refreshingly simple. You really just need a good rimmed baking sheet and some parchment paper.
A rimmed baking sheet is crucial because it contains the oil and prevents anything from sliding off. Lining your baking sheet with parchment paper serves two important purposes.
It prevents sticking and makes cleanup absolutely effortless. The paper also helps with even heat distribution. This contributes to those perfectly golden edges you want.
While any standard baking sheet works well, some home cooks prefer nonstick options. Brands like USA Pan Bakeware offer excellent choices. If you don’t have parchment paper, you can lightly oil your sheet instead.
Having the right tools means you can focus on cooking. You won’t worry about scrubbing stuck-on food off your sheet later.
Tips for Perfect Roasted Broccoli
Achieving restaurant-quality results at home is easier than you think with these pro tips. The secret lies in mastering two simple but crucial techniques that transform ordinary vegetables into something extraordinary.
Mastering the Seasoning with Olive Oil, Salt, and Pepper
Proper seasoning starts with a light, even coating of olive oil. This helps the salt and pepper adhere while promoting beautiful browning. Use your hands to toss everything together for the most consistent coverage.
Don’t be shy with the seasoning—it’s what brings out the natural sweetness. A good rule of thumb is to season until each floret looks lightly speckled.
Achieving Those Irresistible Crispy Edges
The magic happens when you give each piece enough personal space. Spread your florets in a single layer with breathing room between them. Crowding is the enemy of crispiness.
When pieces are too close together, they steam instead of roast. This prevents the golden-brown edges you’re after. If you’re making a larger batch, use two pans rather than cramming everything onto one.
This simple spacing technique creates the perfect contrast between crispy edges and tender centers. Your results will be absolutely irresistible.
Step-by-Step Sheet Pan Preparation
Proper preparation sets the stage for culinary success with this simple sheet pan method. Taking a few minutes to get everything ready ensures your cooking process flows smoothly from start to finish.
Preheating Your Oven and Prepping the Pan
Begin by preheating your oven to 400-425°F. This temperature range works beautifully for creating crispy edges while keeping centers tender. Don’t skip this crucial step!
A properly hot oven ensures your vegetables start caramelizing immediately. Starting with a lukewarm environment can lead to steaming instead of proper roasting.
While your oven heats up, line your baking sheet with parchment paper. This quick preparation takes seconds but saves you from scrubbing later. The paper prevents sticking and promotes even heat distribution.
Position your oven rack in the center for optimal heat circulation. The choice between 400°F and 425°F depends on your preference. Higher temperatures create crispier results but require closer monitoring.
Having everything prepared before your seasoned vegetables hit the oven means you work efficiently. This simple preparation sets you up for success and ensures your sheet pan is ready the moment you need it.
Cooking Techniques for a Golden, Tender Finish
Getting that perfect golden finish requires mastering a few simple but crucial techniques. The way you handle your vegetables during the baking process makes all the difference between mediocre and magnificent results.
Your approach to coating and spacing determines whether you’ll achieve those coveted crispy edges. Proper technique ensures each piece cooks evenly and develops that beautiful caramelization.
Tossing Your Broccoli Evenly
Start by placing your fresh florets directly onto your prepared baking sheet. Drizzle them with olive oil and sprinkle with your salt pepper mixture. Use your hands to toss everything together until each piece gets a light, even coating.
Some cooks prefer tossing in a large bowl first for better distribution. Either method works well—choose what feels most comfortable for you. The goal is consistent coverage without any dry spots.
Once coated, spread your florets in a single layer across the entire baking surface. This spacing is essential for proper air circulation and even cooking. Crowded pieces steam instead of developing those golden edges.
Transfer your sheet to the center of your preheated oven. Set your timer for the minimum recommended baking time—typically around 15 minutes. You can always add extra minutes if needed.
The exact cooking time varies based on your oven’s temperature and the size of your florets. Check around the 14-minute mark for perfect doneness. You’re looking for golden-brown edges with crisp-tender stems.
When your vegetables emerge with that beautiful caramelized color and perfect texture, you’ll know your timing was spot-on. This simple technique delivers consistently excellent results every time.
Flavor Variations to Elevate Your Recipe
Once you’ve mastered the basic preparation, exploring flavor variations opens up endless possibilities. Simple additions can transform your dish into something truly special.

Zesty Lemon Juice and Red Pepper Flakes
Adding smashed garlic cloves creates a restaurant-worthy experience with minimal effort. Use 3-6 whole cloves smashed with your knife’s back instead of mincing them.
This technique prevents burning while infusing incredible flavor. The garlic becomes sweet and mellow rather than harsh. For milder garlic, add it halfway through cooking.
Enhancing with Shaved Parmesan and Garlic
For the ultimate indulgence, sprinkle freshly grated parmesan cheese during the last 2-3 minutes of baking. The cheese melts slightly and creates crispy bits that add both flavor and texture.
You can also add your parmesan cheese as a finishing touch after baking. About 2 tablespoons works perfectly. This classic garlic and parmesan combination is many home cooks’ favorite seasoning variation.
Creative Serving Suggestions for a Versatile Side Dish
Your culinary creativity can truly shine when exploring different ways to serve this delightful dish. The real magic happens when you discover how many meals it complements perfectly.
This vegetable preparation works beautifully alongside virtually any protein. Think simple baked chicken breast or elegant pan-seared steak. It pairs especially well with rich, hearty mains like pot roast or baked salmon.
For pasta nights, serve it alongside lasagna, baked mac and cheese, or baked ziti. The crispy texture provides a wonderful contrast to creamy pasta dishes.
Create healthier meals by piling it into grain bowls. Combine with quinoa, farro, or cilantro lime rice. Then add your favorite protein for a customizable, balanced meal.
Don’t limit yourself to traditional side dish thinking. Leftovers are fantastic chopped into frittatas, mixed into pasta recipes, or added to cold salads.
This recipe truly shines in its versatility. It works equally well for casual weeknight dinners and special weekend meals. Many families keep this dish in regular rotation because it’s one vegetable recipe everyone enjoys.
Planning for Leftovers: Storage and Reheating Tips
Making extra portions of this delicious vegetable dish means you’ll have convenient leftovers ready for busy days. With the right approach, your second-day serving can be almost as satisfying as the fresh version.
Best Practices for Refrigeration
Cool your cooked vegetables completely before storing. Place them in an airtight container in the refrigerator. They’ll stay fresh for 3-4 days this way.
Proper storage maintains both flavor and nutritional value. Avoid leaving them at room temperature for extended periods.
Reheating Techniques to Retain Crispiness
You have several options when you want to reheat your leftovers. Each method offers different results for texture.
- Microwave: Fastest method taking 1-2 minutes, but creates softer texture
- Oven: Better for crispiness – bake at 350°F for 5-7 minutes
- Air fryer: Excellent results in 3-4 minutes at 375°F
While reheated vegetables won’t be identical to fresh-from-the-oven, they’re still far superior to steamed versions. The air fryer does an impressive job restoring that desirable crunch.
If using frozen vegetables instead of fresh, adjust your initial baking time. Roast for 10 minutes first, then season and continue baking for 5-10 more minutes. This technique prevents sogginess.
The best strategy? Enjoy most fresh and save small portions for quick weekday meals. This ensures optimal texture while maximizing convenience.
Nutritional Benefits and Health Perks of Broccoli
What makes this simple vegetable dish truly special goes beyond its incredible flavor. When you prepare it this way, you’re creating one of the healthiest additions to your meal rotation.

This preparation method helps your body access the full spectrum of vitamins. You get generous amounts of vitamin C for immune support, vitamin K for bone health, and vitamin A for vision.
Rich in Vitamins and Antioxidants
The oven method actually preserves more nutrients than boiling. Water-soluble vitamins stay in the florets instead of leaching into cooking water. This makes roasted broccoli one of the best choices for nutrient retention.
You also benefit from sulforaphane, a powerful antioxidant researchers continue to study. This compound supports your body’s natural defense systems in remarkable ways.
Dietary fiber content makes this vegetable particularly satisfying. It supports digestive wellness while helping you feel full longer. The olive oil coating adds heart-healthy fats that improve vitamin absorption.
Seasoning with salt and pepper enhances flavor without compromising nutritional value. When used moderately, these seasonings make eating vegetables enjoyable. This approach represents the broccoli best practice for healthy, delicious eating.
Incorporating this dish regularly supports your family’s wellbeing beautifully. It proves that nutritious food can be absolutely crave-worthy too.
Final Thoughts: Enjoy Your Delicious, Nutritious Broccoli Snack
With this simple method mastered, you can transform ordinary ingredients into something extraordinary. Your kitchen skills now include creating perfect roasted broccoli that serves double duty as both snack and side dish.
This easy broccoli recipe requires minimal effort for maximum reward. In just 25 minutes total, your fresh florets become golden perfection. The crispy edges and tender centers make this dish absolutely irresistible.
Whether you stick with basic salt pepper seasoning or add garlic and parmesan cheese, you’ll create a winner every time. The versatility means you can customize flavors to match any meal.
Now it’s time to preheat your oven and experience why this recipe becomes a family favorite. Those crispy, cheese-topped edges are genuinely addictive. Your new go-to vegetable dish awaits!
FAQ
Can I use frozen florets for this recipe?
You can, but fresh is best for achieving crispy edges. If using frozen, do not thaw them first. Pat them very dry and expect a slightly softer texture.
My vegetable never gets crispy. What am I doing wrong?
The most common culprit is overcrowding the pan. Make sure your pieces are in a single layer with space between them. Also, ensure your oven is fully preheated and you’re using enough oil.
How long should I bake this side dish?
In a preheated 425°F oven, it typically takes 18-22 minutes. You’ll know it’s done when the pieces are tender and the edges are browned and crisp.
What’s the best way to add lemon juice for flavor?
For the brightest taste, add a squeeze of fresh juice after baking. Adding it before can make the dish steam instead of roast.
Can I make this ahead of time for meal prep?
Absolutely! It stores well in an airtight container in the refrigerator for 3-4 days. Reheat it in the oven or an air fryer to bring back the crispiness.
Is parchment paper necessary for the baking sheet?
It’s highly recommended! It prevents sticking and makes cleanup incredibly easy. It also helps promote even browning.